Outstanding iPad Converter
This is a blog about iPad Converter software.We've got plenty of powerful ipad software and many tech articles here to show you.
Powerful New iLife Updated for New Mac
 Hey!
I get some fresh pieces here to show you. It's about the Apple iLife.
Do you know it? It's a new software which run on Apple Mac. It includes
three parts: iPhoto, iMovie and GarageBand. Its latest version is iLife
11. With it, you can have great fun really.
Hey!
I get some fresh pieces here to show you. It's about the Apple iLife.
Do you know it? It's a new software which run on Apple Mac. It includes
three parts: iPhoto, iMovie and GarageBand. Its latest version is iLife
11. With it, you can have great fun really.
As with every Mac in recent memory, Apple's latest hardware releases, the MacBook Air (Mid 2011) and Mac mini (Mid 2011), include the current versions of Mac OS X and iLife--in this case, Lion (OS X 10.7) and iLife '11. (Interestingly, the new models include only iPhoto, iMovie, and GarageBand. iWeb and iDVD are nowhere to be seen.) But these new models don't include a DVD or thumb drive for reinstalling that software.
If you ever have a problem that requires you to reinstall the OS on one of these models, you use the new Lion Recovery feature to boot from a hidden recovery partition of your hard drive and download Lion on demand. Unlike older Macs running Lion, these new models also feature a special version of Lion Recovery, Lion Internet Recovery, that works even if your entire hard drive went south and you had to replace it--you essentially boot your Mac over the Internet, download Lion, and reinstall. When you're back up and running, you can launch the Mac App Store and reinstall the iLife apps, which will be listed on the Purchases screen.
When you reinstall Lion via Lion Recovery, it seems Apple uses information about your Mac's hardware to verify that it has a license for Lion. But what about iLife? When you first set up one of the new Macs, you're prompted for your Apple ID and password. That information is sent to the Mac App Store, which adds licenses for the iLife '11 apps to your Mac App Store account.
But as we've explained when covering the Mac App Store, the license for Mac App Store-purchased software lets you install that software on any Mac authorized with your Apple ID. Purchase an app on your laptop, and you can launch the Mac App Store app on your iMac, click the Purchases button, and install that same app without having to purchase it again.
The iLife license you get when you set up one of the latest Macs is
no different. Which means that if you haven't yet gotten around to
upgrading to iLife '11, buying a new Mac mini or MacBook Air essentially
gets you iPhoto, iMovie, and GarageBand for all your Macs running OS X
10.6.6 or later (since you need at least that version of Snow Leopard to
run the Mac App Store). And this isn't sneaky or dishonest--it's right
there in the Mac App Store's software license.
Of course, this isn't exactly the same as buying the boxed version of iLife '11, since you don't get iWeb or iDVD--you might even use the latter if one of your other Macs still has an optical drive. But it's tough to complain that you aren't getting enough free software.
Here are other pieces about iPad:
convert dvd to ipad, how to put videos on ipad, convert video to ipad, dvd to ipad converter
9 Tips to Handling Your iPad 2 Well
How do you use your iPad 2? As a laptop? Or a
desktop PC? Then i will say you are out! iPad is amazing with its
powerful functions and lovely appearance. It is updated frequently with
more and more functions inside. Are you sure you are mastering your iPad
2? Here i will show you some hidden tips few people know, just see how
much you already know.
Download the free iPad User's Guide: You may have noticed that your iPad didn't come with a big printed manual--that's not Apple's style. However, you can download the PDF version of the iPad User's Guide from Apple's Web site, or you can read it in iBooks if you have that installed (iBooks is available as a free download in the App Store). Make sure to download the manual for iOS 4.3.
Use the Side Switch: You can use that neat switch on the side either to enable and disable audio alerts (this doesn't affect video/audio playback) or to lock the screen's orientation in portrait or landscape mode. You can toggle which function is assigned to the side switch by opening Settings from the Home screen, selecting General, and choosing the function you want under the 'Use Side Switch to' heading.
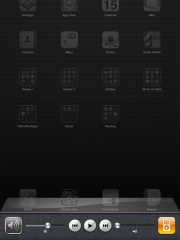 Multitask
in iOS: You probably already know that you can press the Home button
twice to bring up a list of currently running or suspended apps.
However, you can also swipe the multitasking bar left to right to
quickly access audio/video playback controls, a shortcut to the iTunes
app itself, and volume controls. Also, when you choose whether the Side
Switch should mute alert sounds or lock the screen orientation (see the
item above), the function you didn't choose will appear in this shortcut
bar.
Multitask
in iOS: You probably already know that you can press the Home button
twice to bring up a list of currently running or suspended apps.
However, you can also swipe the multitasking bar left to right to
quickly access audio/video playback controls, a shortcut to the iTunes
app itself, and volume controls. Also, when you choose whether the Side
Switch should mute alert sounds or lock the screen orientation (see the
item above), the function you didn't choose will appear in this shortcut
bar.
Don't let AutoCorrect mess you up: If you don't like the option AutoCorrect gives you, reject it by finishing the word as you prefer, and then tapping the suggestion. If you want to use AutoCorrect's choice, just type a space or punctuation mark, or tap Return, the moment it pops up.
Prevent automatic sync once: Sometimes you don't want to sync your iPad when you connect it to your computer. In this case, hold down Shift-Control (or Command-Option, on a Mac) in iTunes while plugging your iPad in, and iTunes will skip the automatic sync just once. Alternatively, you can safely interrupt a sync by dragging the unlock slider while the iPad is midsync.
Make your passcode more complicated: iOS defaults to a four-number passcode, but you can turn it off by going to Settings, General, Passcode Lock, Simple Passcode. Now you can use any full keyboard password to lock the iPad. The password also helps to encrypt your mail and attachments on the iPad, so you probably want to make it safer than a four-digit number.
Show traffic conditions: Open Maps, press the dog-eared page icon in the lower right, and then turn the Traffic overlay on. If your iPad has an Internet connection, Maps will show real-time traffic conditions in the displayed area. Green means traffic is going at the posted speed limit, yellow means traffic is slower than the posted speed limit, and red means traffic is stop-and-go.
Don't forget your downloads: You can immediately see if your iTunes account is due for any incoming downloads by opening iTunes on your PC, clicking the Store menu, and selecting Check for available downloads. This trick can come in handy if your download process is interrupted, or if you missed some bonus iTunes content that came with an album you purchased.
Specify your Spotlight searches: The iPad uses Spotlight for its built-in search functions, and you can tweak it to your needs in Settings, General, Spotlight Search. If you have a lot of data on your iPad, for example, you can selectively disable search in different categories (Contacts, Applications, Audiobooks, Notes, Events, Mail, and so on) that you don't use so that your desired results show up faster. You can also simply change the order in which the search-result categories display by dragging them up and down, so that your more frequently used search categories show up at the top of the page.
Well, i also get some other resource here to show you, they're some
useful software about iPad, if you are interested, just click in to have
a look:
convert video to ipad, how to convert dvd to ipad,rip dvd to ipad,dvd to ipad converter
A Useful guide on Downloading YouTube Videos to iPad Easily
YouTube is one of the most popular video format
now. I'm a YouTube fan, especially like watch funny videos there.
Recently I bought an iPad and was wondering how to download YouTube
videos to iPad so that i can enjoy my favouriate films wherever i go.
As we all know, YouTube is a video-sharing website on which users can
upload, share, and view videos. It is one of the most popular websites
that offer streaming videos. If you want to free download YouTube videos
to iPad and convert YouTube videos for iPad, this tutorial may help
you. It is composed of the following two parts:
Part 1: How to Download YouTube Videos to iPad?
Part 2: How to Convert YouTube Videos to iPad?
Part 1: How to Download YouTube Videos to iPad?
If you're using Safari, there's an easy way to download YouTube videos. Open the page with the movie and press Command-Option-A, which shows the Activity window. If you're also loading other sites, you'll see a list of them: scroll until you find the YouTube page and click on the arrow to show details about what is being loaded.
You will certainly notice an element whose size is over 0.5MB. Double-click on it, and Safari will download it. When the download is over, navigate to the file in the Finder and add the extension .flv to its name. Now you need to convert YouTube videos to iPad.
Part 2: How to Convert YouTube Videos to iPad?
To convert YouTube videos to iPad, you need to get help from an YouTube Video to iPad Converter. Here we recommend you Cucusoft iPad Converter Suite, which can convert various video to iPad compatible format from all popular video formats including DivX, XviD, MOV, rm, MPEG, WMV, AVI, etc.. Just follow the step-by-step guide below.
Step 1: Download Cucusoft iPad Video Converter Suite and install it.
Step 2: Run the program and select the second icon on the right to choose Video to iPad Converter.

Step 3: Click "Open file" button and set the output format in "Profile" list, then set output folder in "Output" area.

Step 4: After choosing the format, you just need to click click "Convert" to start conversion.
When conversion done, simply transfer the converted files to iTunes and then sync to iPad. That's it!
More: how to rip dvd to ipad, dvd to ipad converter, convert video to ipad, how to put videos on ipad
An Easy way to Play Mkv on iPad
MKV is now almost become a universal media container. It Can accommodate many different types of encoded video, audio and subtitle streams. More and more popular films are delivered over the internet in MKV format.
If you want to play MKV files on your iPad, you need to convert MKV to iPad friendly format before you sync them to your iPad. So here comes the problem, how to convert MKV to iPad? Is there any MKV to iPad Converter online for downloading?
Here we provide you an excellent MKV to iPad Converter – Cucusoft Video to iPad Converter Suite, which can easily convert MKV to iPad with high quality and fast speed. This guide will tell you how to convert MKV to iPad videos in an easy manner.
iPad Converter Suite
iPad Video Converter is the easiest-to-use Video iPad Converter software with fast conversion speed. It can convert almost all video format, e.g. DivX, XviD, MOV, rm, rmvb,dvr-ms, MPEG, WMV, AVI to iPad Movie / iPad Video format.
With this Video iPad Converter, you can convert video to iPad in the easiest way and enjoy your favorite movies on your iPad as a MPEG-4 Player freely. Do not hesitate, Free download Video to iPad Converter immediately!
Video iPad Converter Features
Support almost all video file including DivX, XviD, MOV, dvr-ms, rm, rmvb, MPEG, WMV, AVI ... to iPad video (MP4/H.264 format)
Support various iPad video size including H.264 video up to 720p, 30 frames per second, Main Profile level 3.1 with AAC-LC audio up to 160 Kbps, 48kHz, stereo audio in .m4v, .mp4, and .mov file formats; MPEG-4 video, up to 2.5 Mbps, 640 by 480 pixels, 30 frames per second, Simple Profile with AAC-LC audio up to 160 Kbps, 48kHz.
Support any video file that can be played under Windows Media Player properly.
"Drag and Drop" functions are supported by this Video iPad Converter.
Cool UI skin available.
Guide: How to Convert MKV to iPad, Play MKV on iPad
Step 1: Run
Run Cucusoft iPad Video Converter Suite and select "Video to iPad", then click "Open file" to add the MKV files.
Step 2: Settings
Set the output format as iPad compatible format from the "Profile" list, then set output folder in "Output" area.
Step 3: Conversion
When all settings done, click "Convert" to start to convert MKV to iPad. That's all. Now you can play MKV on iPad as you like!
You can read more here: how to convert dvd to ipad, dvd to ipad converter, import video to ipad
MacBook Air, Mac Mini Come on with Thunderbolt
Everyday when i come off duty, i can't help watching the latest Apple news. Actually i am an Apple fan really. I collect all the news about Apple products from newspapers、website、magzines. Is it crazy? Today it is about Thunderbolt. What's Thunderbolt? It is said to be the fastest, most versatile I/O ever.
 Thunderbolt
is a revolutionary I/O technology that supports high-resolution
displays and high-performance data devices through a single, compact
port. It sets new standards for speed, flexibility, and simplicity. And
it’s on MacBook Air, MacBook Pro, iMac, and Mac mini.
Thunderbolt
is a revolutionary I/O technology that supports high-resolution
displays and high-performance data devices through a single, compact
port. It sets new standards for speed, flexibility, and simplicity. And
it’s on MacBook Air, MacBook Pro, iMac, and Mac mini.
At the same time Apple released its long-awaited Mac OS X 10.7 Lion (in a first, via online-only distribution), the tech giant also updated two of its Macintosh computers to include the Thunderbolt external bus technology that provides transfer rates of up to 10Gbps and supports storage, network, and video connections. The MacBook Air slim laptop and the Mac Mini small-footprint desktop both now come with Thunderbolt. The MacBook Pro and iMac were released with Thunderblt ports earlier this year. Only the Mac Pro ships without Thunderbolt.
MacBook Air, MacBook Pro, iMac, and Mac mini now give you access to a world of high-speed peripherals and high-resolution displays with one compact port. That’s because Thunderbolt is based on two fundamental technologies: PCI Express and DisplayPort.
PCI Express is the technology that links all the high-performance components in a Mac. And it’s built into Thunderbolt. Which means you can connect external devices like RAID arrays and video capture solutions directly to your Mac — and get PCI Express performance. That’s a first for any computer. Thunderbolt also provides 10 watts of power to peripherals, so you can tackle workstation-class projects. With PCI Express technology, you can use existing USB and FireWire peripherals — even connect to Gigabit Ethernet and Fibre Channel networks — using simple adapters.
All that power and blazing-fast data transfer flows through the Apple Thunderbolt Cable, one of the most advanced cables ever made. No single cable has been able to do so many things and do them with such astonishing speed. It doesn’t just connect high-performance devices. It is one in its own right.
And because Thunderbolt is based on DisplayPort technology, the video
standard for high-resolution displays, any Mini DisplayPort display
plugs right into the Thunderbolt port. To connect a DisplayPort, DVI,
HDMI, or VGA display, just use an existing adapter.
The Air also comes with a backlit keyboard, a feature dropped in the
MacBook Air release of last fall. Both the MacBook Air and Mac Mini also
sport Intel Core i5 and i7 processors, depending on the configuration,
providing what Apple says are significant speed increases of about 200
percent. The graphics processors have also been updated with faster
versions.
With Thunderbolt, you’re just as likely to build a professional video setup around your MacBook Pro or iMac as your Mac Pro. If you’re a video editor, imagine using a single port to connect high-performance storage, a high-resolution display, and high-bit-rate video capture devices to handle all the post-production for a feature film. Thunderbolt I/O technology allows you to daisy-chain up to six Thunderbolt peripherals, including an Apple Thunderbolt Display and the Promise Pegasus RAID or LaCie Little Big Disk.1 You can even add an Apple LED Cinema Display to the end of the chain.
And that’s just the beginning. With Thunderbolt technology, peripheral manufacturers finally have what they need to take high-performance devices from workstations and top-of-the-line desktops to just about any computer.
The basic Air model is priced at $999, and displaces the now-discontinued white MacBook (which had the same baseline price) as Apple's entry-level laptop.
The baseline Mac Mini costs $599, but has no input devices or monitor. The Mac Mini continues to be available in a $999 model optimized for Mac OS X Lion Server; that model has two 500GB hard disks rather than the single 500GB disk in other configurations, and an i7 processor rather than the i5 processor in other Mac Mini models.
Apple also released an updated version of its $999 Cinema Display with Thunderbolt ports.
For more resource and information about iPad,click here:
how to put videos on ipad, how to convert dvd to ipad, dvd to ipad converter, Convert MKV to iPad
Amazing Google+ iPhone App: Useful Tips
Do you know G+? G+ is a shortened form of Google+, which is a free app just arrived on the iPhone. Its goal is to share the fun of real life experience more easier, and to narrow the distance between people so that eveyone can exchange just like in real life.
Almost a month after Google announced its new social network, the Google+ iPhone app is finally available in the iTunes App Store. Those who downloaded the app Tuesday when it first went live complained of a litany of bugs. Google has since released an update, fixing many of the errors.
The Google+ iPhone app is impressive–it has a fairly intuitive interface, a clean design and a few cool features unique to the mobile version. And while any iPhone user can download it now, only users with Google+ invitations can currently use it.
Here’s a look at five things you should know about the Google+ iPhone app, from changing your location settings to uploading photos, and a few tips to help you along the way.
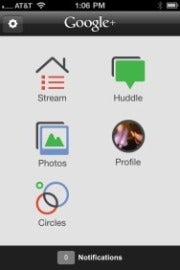
1. View Your Google+ Stream Three Ways
When you open the Google+ iPhone app, the home screen displays five features: your stream of updates; Huddle, the feature that lets you chat among your circles; photos; your profile; and your circles. Tap “Stream” to access three views of updates.
The first view of your stream includes updates only from Google+ users in your circles. Visually, it looks a lot like Facebook’s iPhone app with the user’s photo next to their update, an excerpt from a link they attached and comments from other Google+ users.
Swiping your finger across the screen from right to left will change the view of your stream to something unique to the Google+ iPhone app: incoming messages from people near your current location.
Swiping your finger once more from right to left will change the stream view to “Incoming,” which includes posts from everyone who has put you in a circle.
2. Google+ Check-Ins
At the top right of the app you’ll see two icons: a checkmark and a pencil. Tap the checkmark to load a list of locations near you and check in.
By default, check-in privacy is set so only those in your circles can view it. You can change this by tapping the “Your circles” bar. You can also attach a photo from your camera or take a picture.
Unlike Foursquare or Facebook check-ins, there are no deals attached to checking in, though it’s likely that feature will come soon. Clicking on a location from the mobile app will load the corresponding Google Places page.
3. Remove Your Location from Google+ Updates
While the Google+ iPhone app may limit your location to only your circles, by default, all your mobile updates will include roughly where you are. Here’s how to remove your location: Click the pencil icon in the top right to create a new post. Your location is listed just above the camera icon on the bottom. Click the X next to it. This bar will now read “No location attached.”
There does not seem to be individual settings for the Google+ iPhone app, which means if you never want your location attached to an update, you will need to turn it off every time.
4. Comment On, +1 and Mute Google+ Posts

One part of the Google+ iPhone app that needs tweaking is the interaction with posts in your streams. Unlike Facebook’s iPhone app, there are no buttons within your streams that let you comment on, +1 or mute someone’s post. Instead, you need to tap the individual’s post, which will take to you a new page, in order to comment.
This new page includes a +1 button at the top, as well as a drop-down menu at the bottom with options to mute or report the post. One big feature that is missing: the ability to share posts from within the app.
5. Uploading Photos to Google+
While you can attach photos to any update, you can also upload ones individually or in bulk via the Photos button on your Google+ home screen. One cool feature: Your photos homepage displays four albums (“From your circles,” “Photos of you,” “Your albums,” and “From your phone) and flashes the images in a slideshow you can view from this screen.
The Google+ iPhone app makes uploading pictures from your phone particularly easy. Tap the album “From your phone.” This will load all the photos you have stored on your iPhone. Then tap the individual pictures to select them and click Share.
For a first release, the Google+ iPhone app is pretty solid. It’s still early to see how the group chat feature, Huddle, will take off, but as Google+ opens the flood gates to more users, this is likely to become a popular element.
Want to know how to rip dvd to ipad, or convert video to ipad? You can follow my articles, i will show you many useful software and information about ipad. Here are also resource about dvd to ipad converter for mac and import video to ipad.